#fetching data from a third party api with vue js and axios
Explore tagged Tumblr posts
Visit Tumblr Blog
Explore Tumblr blogs with no restrictions, modern design and the best experience.
Last Seen Tumblr Blogs


Fun Fact
Mobile Tumblr US users spend an average of 4.04 minutes per session on the app.
Text
Vue-js Post request example
Vue-js Post request example
We will Learn the below things in this Blog Article. How we install axios via npm ?How to install node modules ?What is axios ?How to import Axios ?Sending post request via AxiosCompiling assest. we will learn about how we can send post requests by using Axios, if Axios is not present in your comoper.json file then you can use the below command to install the Axios npm install axios Before…

View On WordPress
#axios npm#fetching data from a third party api with vue js and axios#install axios in vue#nuxt axios post example#vue axios cdn#vue axios example#vue axios is not defined#vue axios plugin#vue axios post#vue axios post json data#vue js axios post example#vue js post request example
1 note
·
View note
Photo

Fetching Data from a Third-party API with Vue.js and Axios ☞ https://codequs.com/p/Hyi_NT9FN/fetching-data-from-a-third-party-api-with-vue-js-and-axios #vuejs #javascript
1 note
·
View note
Photo

Fetching Data from a Third-party API with Vue.js and Axios ☞ https://codequs.com/p/Hyi_NT9FN/fetching-data-from-a-third-party-api-with-vue-js-and-axios #vuejs #javascript
1 note
·
View note
Photo

Fetching Data from a Third-party API with Vue.js and Axios ☞ https://codequs.com/p/Hyi_NT9FN/fetching-data-from-a-third-party-api-with-vue-js-and-axios #vuejs #javascript
0 notes
Photo

Fetching Data from a Third-party API with Vue.js and Axios ☞ https://codequs.com/p/Hyi_NT9FN/fetching-data-from-a-third-party-api-with-vue-js-and-axios #vuejs #javascript
0 notes
Photo

Fetching Data from a Third-party API with Vue.js and Axios ☞ https://codequs.com/p/Hyi_NT9FN/fetching-data-from-a-third-party-api-with-vue-js-and-axios #vuejs #javascript
0 notes
Photo

Fetching Data from a Third-party API with Vue.js and Axios ☞ https://codequs.com/p/Hyi_NT9FN/fetching-data-from-a-third-party-api-with-vue-js-and-axios #vuejs #javascript
0 notes
Photo

Fetching Data from a Third-party API with Vue.js and Axios ☞ https://codequs.com/p/Hyi_NT9FN/fetching-data-from-a-third-party-api-with-vue-js-and-axios #vuejs #javascript
0 notes
Photo

Fetching Data from a Third-party API with Vue.js and Axios ☞ https://codequs.com/p/Hyi_NT9FN/fetching-data-from-a-third-party-api-with-vue-js-and-axios #vuejs #javascript
0 notes
Photo

Fetching Data from a Third-party API with Vue.js and Axios ☞ https://codequs.com/p/Hyi_NT9FN/fetching-data-from-a-third-party-api-with-vue-js-and-axios #vuejs #javascript
0 notes
Text
Building Mobile Apps With Ionic And React
Building Mobile Apps With Ionic And React
Ahmed Bouchefra
2019-08-07T12:30:00+02:002019-08-07T10:36:12+00:00
Ionic has recently added support for React; so now, React developers can get the advantages of Ionic to build hybrid mobile apps and progressive web apps (PWAs). In this post, we’ll show you how to get started using Ionic with React by building a simple demo app from scratch.
Prerequisites
In order to properly follow this tutorial, you’ll need the following prerequisites:
recent versions of Node.js and npm installed on your system,
working knowledge of TypeScript and React.
You can check that you have the latest Node.js version (v10) installed by running the following command:
$ node -v
Introducing React And Ionic
Let’s start with brief introductions to both React and Ionic.
According to the official website:
“React is a declarative, efficient, and flexible JavaScript library for building user interfaces. It lets you compose complex UIs from small and isolated pieces of code called ‘components’.”
React focuses on building UIs and doesn’t provide any built-in tools for the common tasks required in web development, such as fetching remote data and routing, so you’ll need to use some existing third-party libraries for these tasks.
According to the Ionic website:
“Ionic Framework is the free, open-source mobile UI toolkit for developing high-quality cross-platform apps for native iOS, Android, and the web — all from a single codebase.”
Basically, it’s a set of UI components that you can use with plain JavaScript or any popular front-end framework or library, such as Angular, React or Vue, to build a hybrid mobile app and PWA.
In this tutorial, we’ll see and use some Ionic UI components such as the following:
IonMenu: With this, a navigation drawer will slide in from the side of the current view.
IonToolbar: These top bars are positioned above or below the content.
IonHeader: This parent component holds the toolbar component.
IonContent: This component provides a content area, with methods to control the scrollable area and other things. You need only one content component inside a single view.
IonList: This component contains items with similar data content, such as images and text. It’s made up of IonItem objects.
IonItem: This component may contain text, icons, avatars, images, inputs and any other native or custom element.
IonButton: This component provides a clickable element, which can be used in a form or anywhere that needs simple, standard button functionality.
Installing Ionic CLI v5
Ionic’s command line interface (CLI), version 5, has support for creating Ionic projects based on React. So, let’s get started by installing the tool from npm.
Open a CLI, and run the following command:
$ npm install -g ionic
At the time of writing, Ionic’s CLI v5.2.3 is the latest.
Note: *According to how you installed Node.js in your system, you may need to add sudo before your command in macOS or Linux or run the command prompt as administrator in Windows if you get any permission errors. You can also simply fix your npm permissions or use a tool such as nvm.*
Next, install Cordova Resources (which is used to generate Cordova resources locally) and Native Run (used to deploy app binaries to devices):
$ npm install -g cordova-res native-run
These are required only if you want to test your application on a real mobile device or emulator.
Creating An Ionic And React Project
Now, let’s create a project based on React. Go back to your terminal, make sure you are in your working directory, and run the following command:
$ ionic start myApp --type=react
We use --type=react to generate a project based on React. You’ll next need to choose a starter template from the available ones. Let’s pick sidemenu for a starter template with a side menu and navigation.
After generating the project and installing the dependencies, you can serve your app locally using the following commands:
$ cd ./myApp $ ionic serve
Your app will be available from the http://localhost:8100 address, and you can actually use your web browser to start playing with it.
Ionic is called a hybrid mobile framework because it makes use of web technologies that were originally designed to create web apps, along with a native container (Cordova or Capacitor), to build mobile apps without using native technologies for the target platforms, such as Java or Kotlin for Android or Swift for iOS.
Because your mobile app is actually a web application, you can do most development by testing in a web browser without using an emulator or a real mobile device, except for testing native device features such as the camera or the SQLite storage, in case you’ve used them in your app. In fact, it’s even possible to use certain techniques to mimic the plugins that provide the native features and do the entire testing during development in your web browser.
Cleaning Our Project
We have the app’s basic structure, with two pages (home and list) and a menu. Let’s remove the list page since it’s just boilerplate code.
First, remove the src/pages/List.tsx file, then open the src/App.tsx file, and remove the entry for the list page from the appPages array:
const appPages: AppPage[] = [ { title: 'Home', url: '/home', icon: home } ];
Also, remove the import of the list page from the file:
import List from './pages/List';
Next, remove <Route path="/:tab(home)/list" component={List} exact={true} /> from the App component:
const App: React.FunctionComponent = () => ( <IonApp> <IonReactRouter> <IonSplitPane contentId="main"> <Menu appPages={appPages} /> <IonPage id="main"> <IonRouterOutlet> <Route path="/:tab(home)" component={Home} exact={true} /> <Route exact path="/" render={() => <Redirect to="/home" />} /> </IonRouterOutlet> </IonPage> </IonSplitPane> </IonReactRouter> </IonApp> ); export default App;
The App component is the root component that gets rendered by our application. If you open the src/index.tsx file, you’ll find the following code:
import React from 'react'; import ReactDOM from 'react-dom'; import App from './App'; ReactDOM.render(<App />, document.getElementById('root'));
The render() method is used to render a React element into the DOM in the supplied root element.
Theming The App
Having created, served and cleaned our Ionic project, let’s now see how we can change the colors of the UI so that it looks more professional.
Let’s get started with the side menu. Open the src/components/Menu.tsx file, and add a color attribute with a primary value to the IonToolbar, IonContent, IonList and IonItem UI components:
const Menu: React.FunctionComponent = ({ appPages }) => ( <IonMenu contentId="main"> <IonHeader> <IonToolbar color="primary"> <IonTitle>Menu</IonTitle> </IonToolbar> </IonHeader> <IonContent color="primary"> <IonList style= color="primary"> {appPages.map((appPage, index) => { return ( <IonMenuToggle key={index} auto-hide="false"> <IonItem color="primary" href={appPage.url}> <IonIcon slot="start" icon={appPage.icon} /> <IonLabel>{appPage.title}</IonLabel> </IonItem> </IonMenuToggle> ); })} </IonList> </IonContent> </IonMenu> );
Ionic provides some default colors (primary, secondary, tertiary, success, warning, danger, light, medium and dark) that can be used to change the color of UI components. A color can be applied to an Ionic component in order to change the default colors using the color attribute. See “Colors” for more information.
These colors have default values, but you can customize them via some predefined CSS variables. See “Modifying Colors“.
This is a screenshot of our menu:
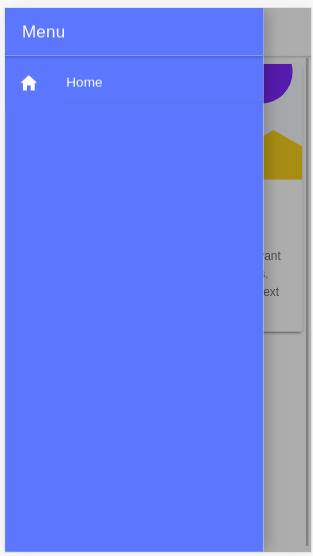
Ionic menu. (Large preview)
Next, let’s change the color of the Home page. Open the src/pages/Home.tsx file, and set the color attribute of the IonToolbar and IonContent components to primary:
const HomePage: React.FunctionComponent = () => { return ( <> <IonHeader> <IonToolbar color="primary"> <IonButtons slot="start"> <IonMenuButton /> </IonButtons> <IonTitle>Home</IonTitle> </IonToolbar> </IonHeader> <IonContent color="primary" > </IonContent> </> ); };
This is a screenshot of the page:

Ionic home. (Large preview)
Installing Axios And Consuming A REST API
We’ll see how to install Axios and consume a third-party RESTful API in our application, and we’ll also see how to display the fetched data using Ionic card and list components.
Having themed our application, let’s now see how to fetch data using Axios. We’ll use the third-party API available from NewsAPI.org.
First, we need to grab an API key, so that we can communicate with the API. Go to the registration page, enter your information, and register an account. You’ll be given an API key; note it, and let’s continue.
Head back to your terminal, and run the following command to install Axios:
$ npm install axios --save
Next, open the src/pages/Home.tsx file, and start by importing Axios and IonButton:
import { IonButton } from '@ionic/react'; import axios from 'axios';
Next, define the API_KEY and URL constant variables:
const API_KEY = "<YOUR_API_KEY_HERE>"; const URL = `https://newsapi.org/v2/top-headlines?sources=techcrunch&apiKey=${API_KEY}`;
In the URL variable, we’ll add an endpoint to get the top headlines from our source, TechCrunch. You can use any source you want from the available sources.
Note: Make sure to put your own API key in the API_KEY variable.
Next, define the fetchArticles() method as follows:
const fetchArticles = () => { return axios({ url: URL, method: 'get' }).then(response => { console.log(response); return response.data; }) };
We simply call the axios() method to send a GET request to the news endpoint, and the result from the method is a promise that needs to be resolved in order to get the news data.
Next, update the HomePage component as follows to call the fetchArticles() method and resolve the returned promise:
const HomePage: React.FunctionComponent = () => { const [articles, setArticles] = React.useState([]); const items: any[] = []; React.useEffect(() => { fetchArticles().then(data => setArticles(data.articles)); }, []); return ( <> <IonHeader> <IonToolbar color="primary"> <IonButtons slot="start"> <IonMenuButton /> </IonButtons> <IonTitle>Home</IonTitle> </IonToolbar> </IonHeader> <IonContent color="primary" > <IonList color="primary"> { articles.map(a => { return ( <IonItem> {a['title']} <IonButton href={a['url']} color="primary" slot="end">Read</IonButton> </IonItem> ); }) } </IonList> </IonContent> </> ); };
In our function component, we first call the useState() hook of React to create the articles state variable, which will hold the news articles after we fetch them from the API.
useState() returns the state variable, which has the empty array as its initial value and a function that we can use to change the value of the variable. We use destructuring assignment to unpack the values from the returned pair into distinct variables (i.e. articles and setArticles()).
Next, we call the useEffect() hook to perform a side effect in our component. In our case, the side effect is to fetch data from the news API using the fetchArticles() method, which returns a promise. Once the promise is resolved, we call the setArticles() method to assign the news data to the articles variable.
Both useState() and useEffect() are built-in React hooks that were introduced in React 16.8; they simply let you use state and other React features without having to write a class. The useEffect() hook is equivalent to calling the componentDidMount, componentDidUpdate and componentWillUnmount lifecycle methods combined in class-based components.
Finally, in the view template, we iterate over the articles array using the map() method, and we display the title of each news article inside an IonItem element of the IonList component, and also a button that takes us to the page of the full article.
This is a screenshot of the page:
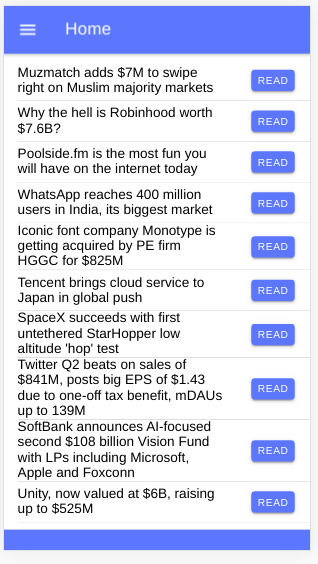
Ionic news app (Large preview)
You can find the source code in this GitHub repository.
Conclusion
In this tutorial, we have started using both Ionic and React and used them to build a simple mobile application that fetches and displays news data from a third-party API using the Axios client. We have also seen how to use hooks in React — namely, the useState() and useEffect() hooks — to create state and perform side effects inside React function components. With Ionic, we’ve seen how easy it is to generate a project based on React and how we can theme the application using the color attributes of components.

(dm, al, yk, ra, il)
0 notes
Photo

Fetching Data from a Third-party API with Vue.js and Axios ☞ https://codequs.com/p/Hyi_NT9FN/fetching-data-from-a-third-party-api-with-vue-js-and-axios #vuejs #javascript
0 notes